Active/Passive residues
We have a deeper explanation of these at our Best Practice Guide - but for brevity , we can say that:
- Active residues MUST be in contact with the other molecule.
- Passive residues COULD be in contact with the other molecule.
Let's say you have two proteins A and B; for protein A, you have very high confidence, based on your experiments, in information retrieved from the literature or bioinformatic predictions that residue number 950 is very important for the interaction.
However for protein B you do not know the exact residues involved in the interaction, but you know that the interaction happens in a specific region of the protein. Let's say this region is between residues 41 and 45.
In this example, your active residues are:
- Protein A: 950
- Protein B: 41, 42, 43, 44, 45
For your passive residues, you can select a region around your active residues to serve as the passive residues. This is a way to tell the docking software that these residues are not as important as the active ones, but they could be in contact with the other molecule.
You can do the passive selection manually, by visual inspection or
haddock-restraintscan do it automatically for you, using thepassive_from_activeoption.
In the end, your configuration file will look like this:
[
  {
    "id": 1,
    "chain": "A",
    "active": [950],
    "passive": [],
    "structure": "proteinA.pdb",
    "passive_from_active": true,
    "target": [2]
  },
  {
    "id": 2,
    "chain": "B",
    "active": [41, 42, 43, 44, 45],
    "passive": [],
    "structure": "proteinB.pdb",
    "passive_from_active": true,
    "target": [1]
  }
]
Visually, the restraints generated by this configuration file will look like this:
| Protein A | Protein B |
|---|---|
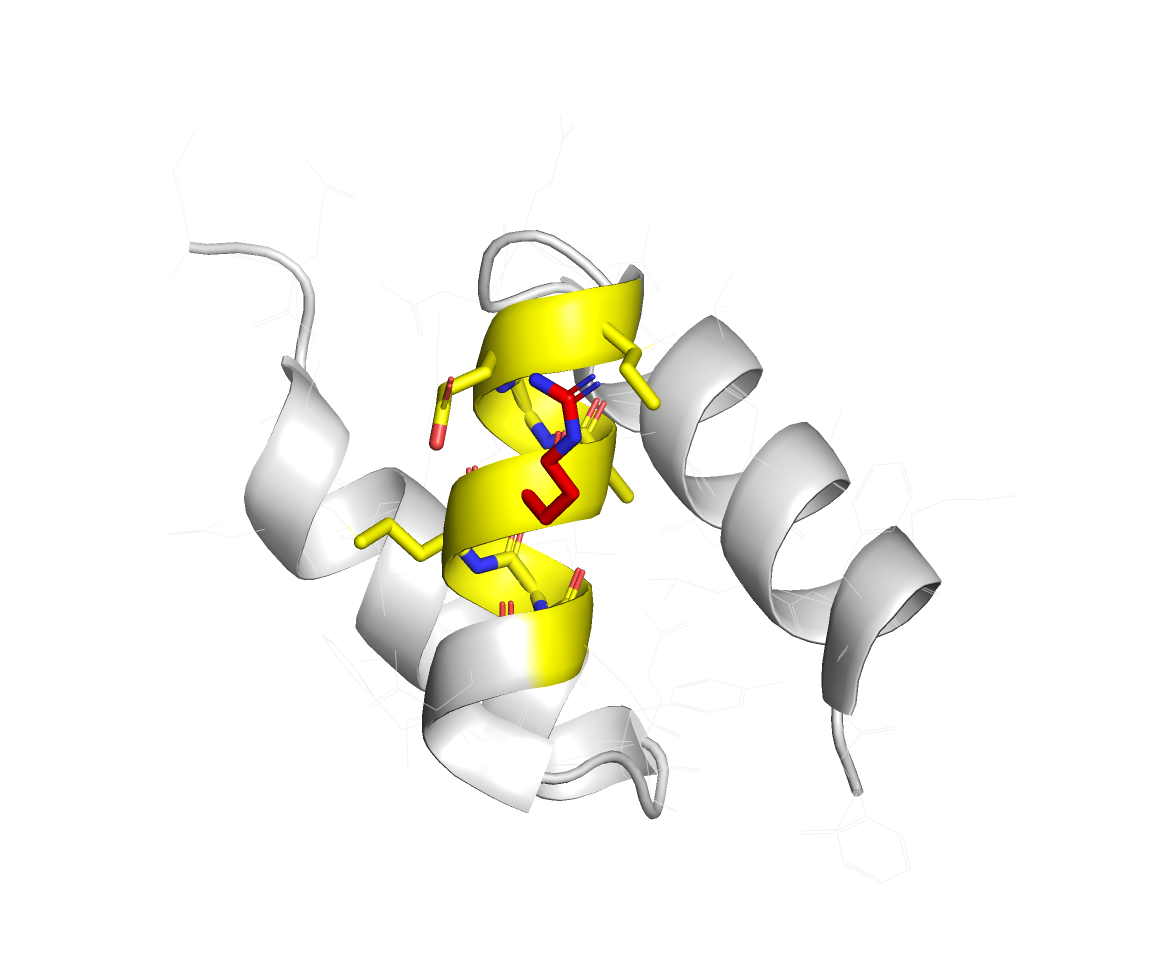 | 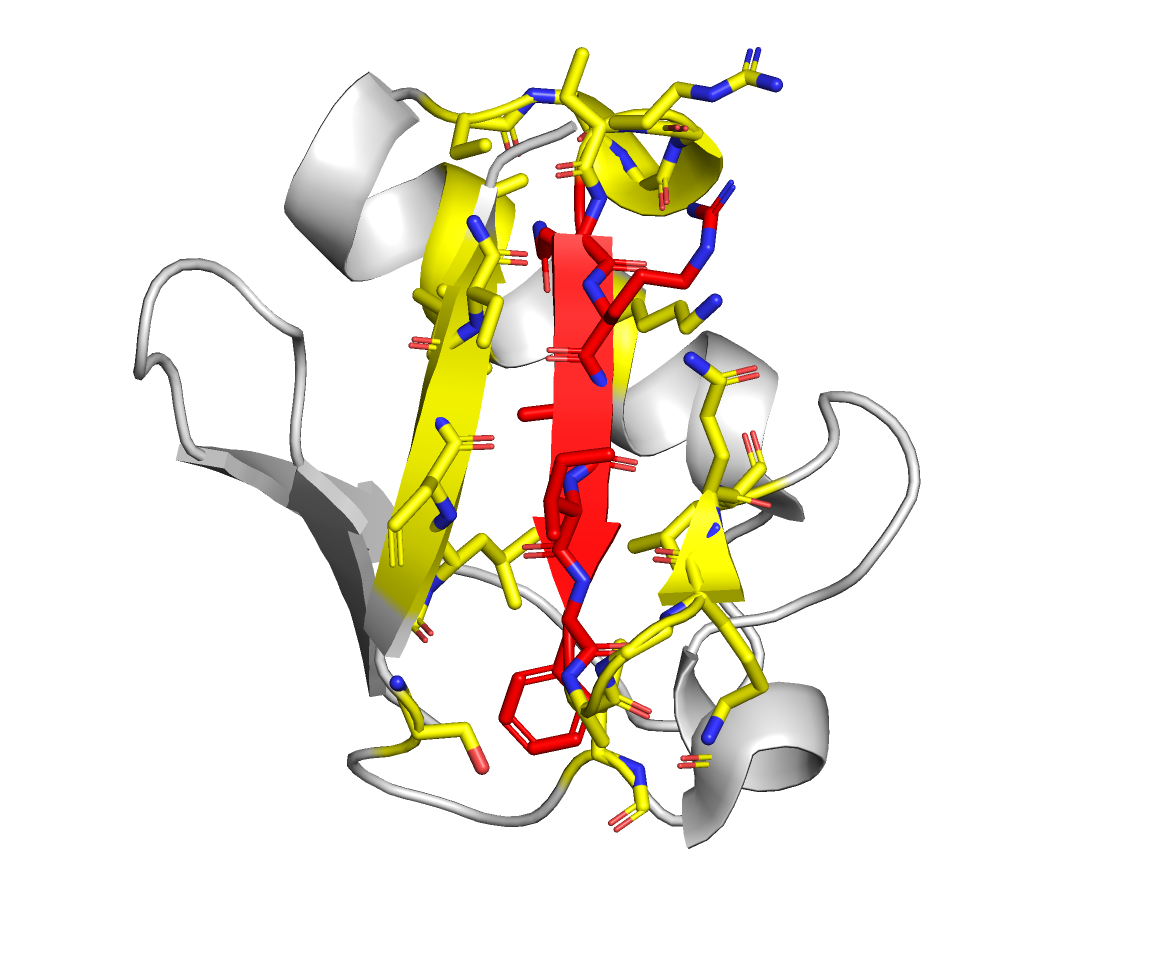 |
Active residues are in red, and the passive residues are in yellow.